Mappers Quickstart
This guide will show you step by step how to contribute data to the Mappers project with an off-the-shelf tracker. This guide will use the Dragino LGT92, but any LoRaWAN compatible tracker will work.
Steps
- Add device to Console.
- Create new Label and HTTP integration with Mappers API ingest endpoint.
- Create Function Decoder to decode device payload and attach to Label created in first step.
- Attach Label to tracking device and verify data is being sent successfully.
1. Add Device to Console
To start, you'll need to add your device to Console. You should have been provided with a DevEUI, AppEUI, and AppKey from the seller of the device. Follow our quickstart for instructions on how to add a new device to Console.
2. Create HTTP Integration
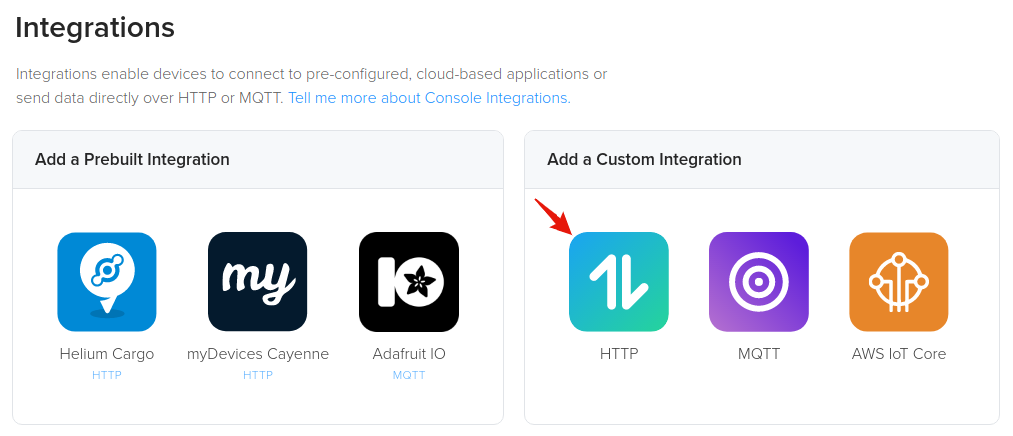
To start, we'll create a new HTTP integration in Console. Navigate to the Integrations page using the left navigation and then select the HTTP integration.
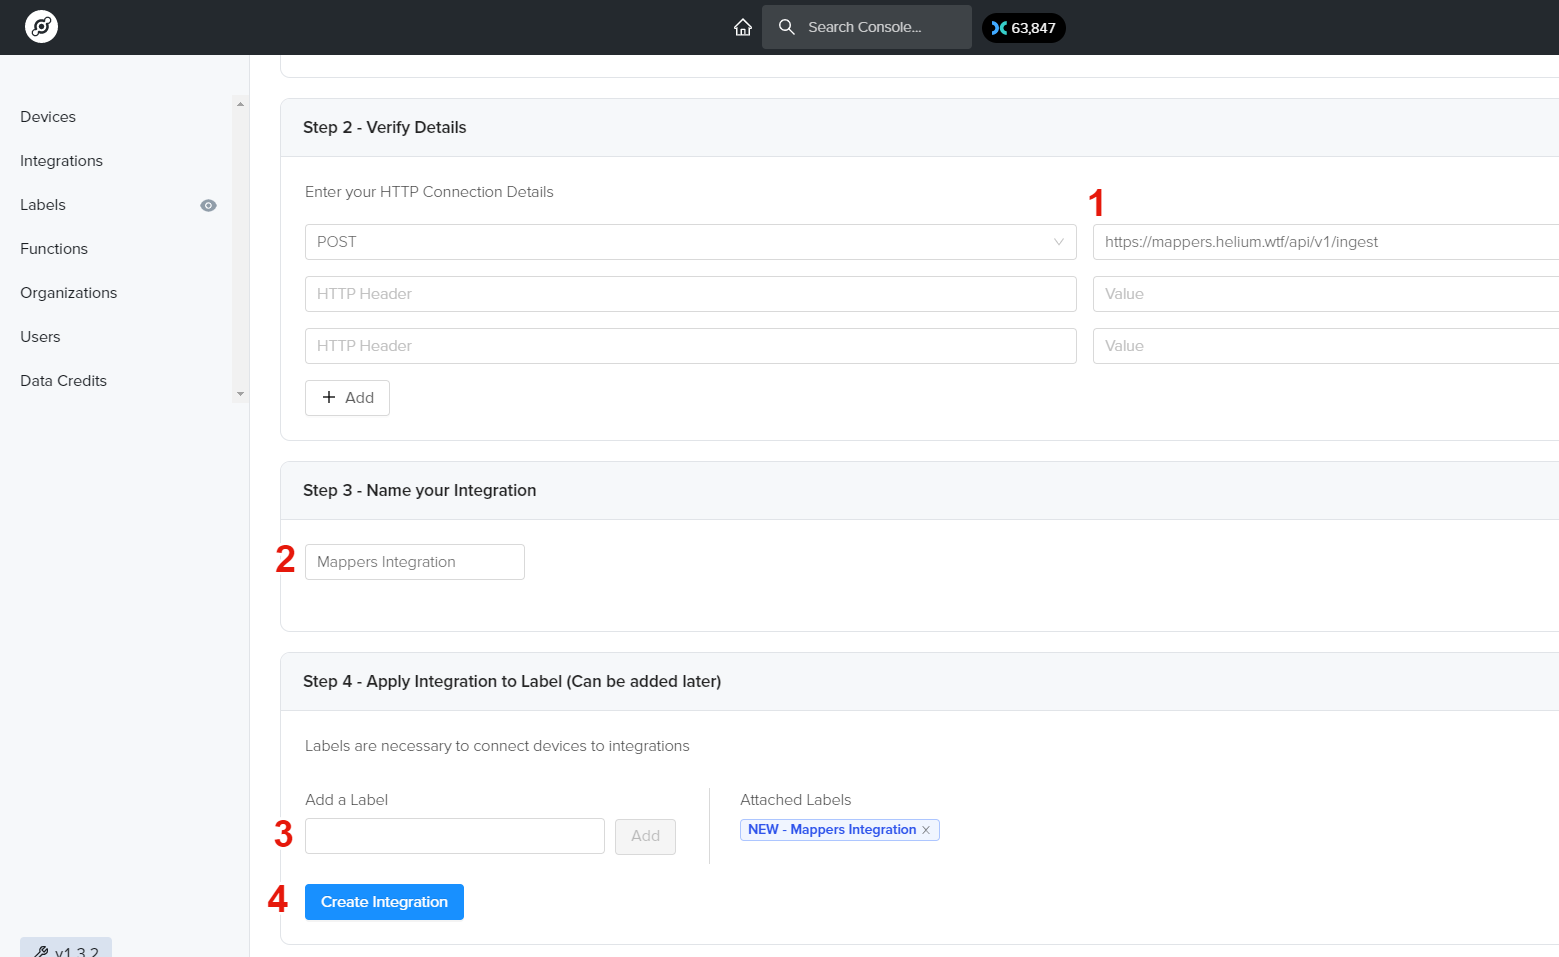
Next we'll fill in the details, see instructions and image below.
- Enter the Mappers API Ingest endpoint
https://mappers.helium.wtf/api/v1/ingest - Enter the name for this Integration: Mappers Integration
- Create and apply a Label for this Integration, we've used the same name as the integration.
- Finally, click Add Integration to complete.
3. Create Function Decoder
Next, we'll be creating a Function decoder to decode the payload from the device and properly format it for the API endpoint. The decoder is specific to the encoding scheme used to encode the data before the device transmits it. For off-the-shelf devices this is usually manufacturer specific. For development devices, CayenneLPP if often used. For this guide we'll be using a decoder specifically made for this tracking device and slightly modifying it by adding two additional required fields. The original decoder can be found from the manufacturer's website here.
To start, navigate to the Functions page using the left navigation and then click Add Function.
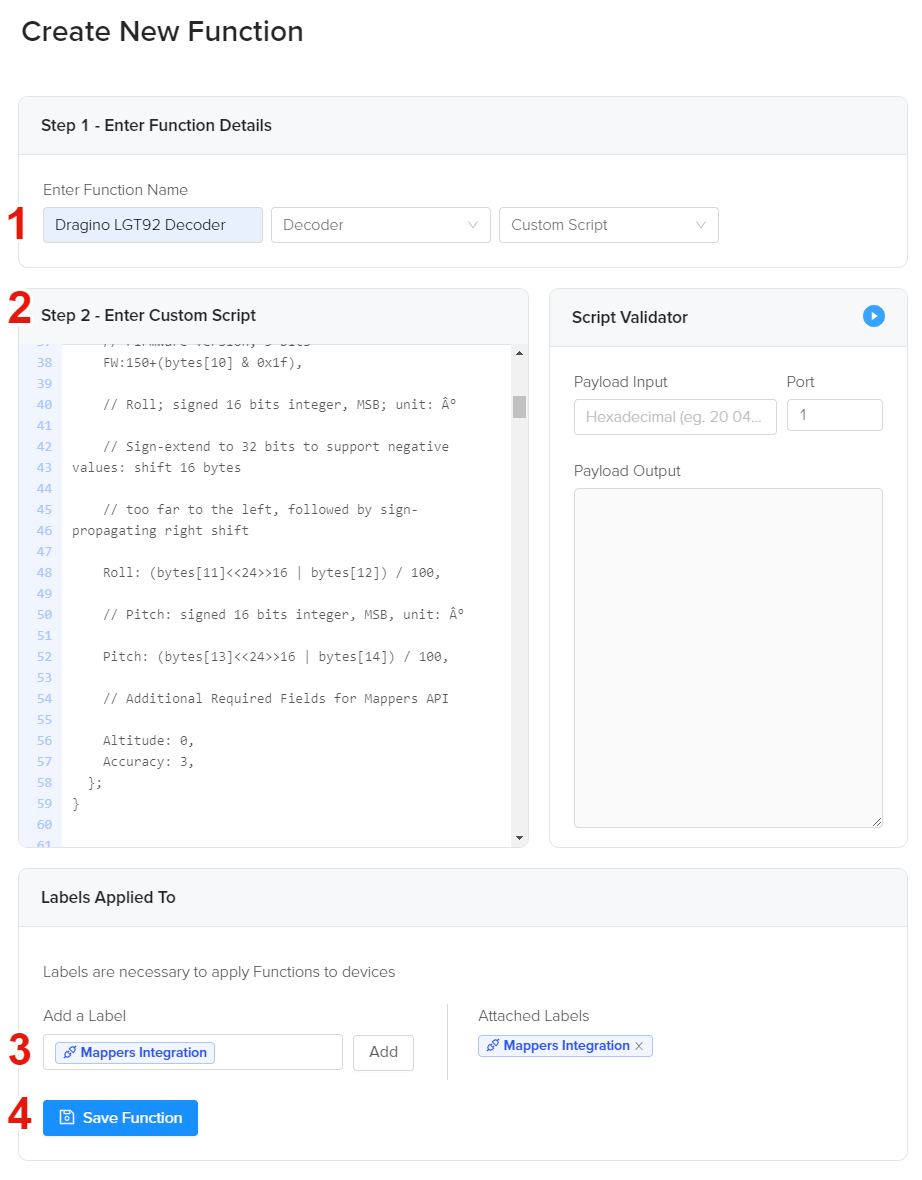
Enter a name for the decoder (below we've used Dragino LGT92 Decoder), select the type of Function, Decoder in this case, and finally select Custom Script from the drop down.
Copy and paste the complete decoder function provided by the manufacturer found here or below.
function Decoder(bytes, port) {
// Decode an uplink message from a buffer
// (array) of bytes to an object of fields.
var value=bytes[0]<<16 | bytes[1]<<8 | bytes[2];
if(bytes[0] & 0x80)
{
value |=0xFFFFFF000000;
}
var latitude=value/10000;//gps latitude,units: °
value=bytes[3]<<16 | bytes[4]<<8 | bytes[5];
if(bytes[3] & 0x80)
{
value |=0xFFFFFF000000;
}
var longitude=value/10000;//gps longitude,units: °
var alarm=(bytes[6] & 0x40)?"TRUE":"FALSE";//Alarm status
value=((bytes[6] & 0x3f) <<8) | bytes[7];
var batV=value/1000;//Battery,units:V
value=bytes[8]<<8 | bytes[9];
if(bytes[8] & 0x80)
{
value |=0xFFFF0000;
}
var roll=value/100;//roll,units: °
value=bytes[10]<<8 | bytes[11];
if(bytes[10] & 0x80)
{
value |=0xFFFF0000;
}
var pitch=value/100; //pitch,units: °
return {
Latitude: latitude,
Longitude: longitude,
Roll: roll,
Pitch:pitch,
BatV:batV,
ALARM_status:alarm,
Altitude: 0,
Accuracy: 3,
};
}
Next we need to add two more fields that are required by the Mappers API but missing from the function. You'll see these at the bottom of the editor window in the screen shot below. Altitude is permanently set to zero because this device does not output altitude and we will assume that the tracker will be used at ground level. Accuracy is set to three meters since this device does not output a measure of accuracy and this is a reasonable measure of precision to be expected for this device. Find more details on the API specification here.
Next search for and add the Mappers Integration label we created with the integration.
Finally save your function.
4. Attach Label to Device
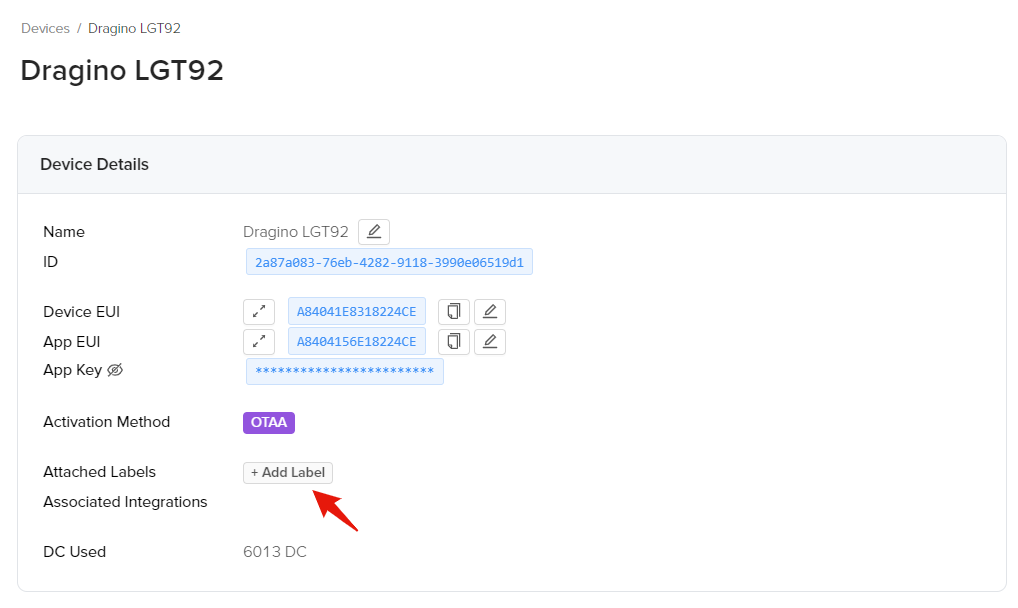
Next we'll attach the Mappers Integration label to the device. Navigate to your device page and click the Add Label button shown below.
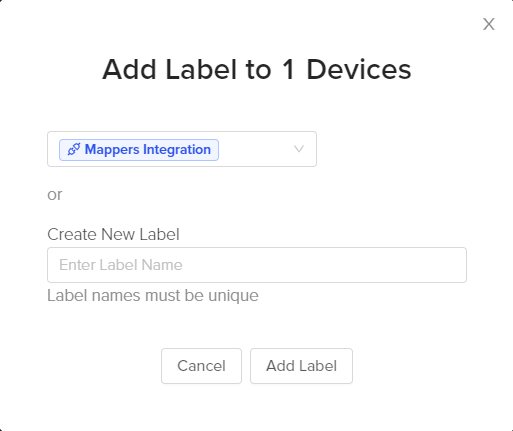
Search for the Mappers Integration label and click Add Label as shown below.
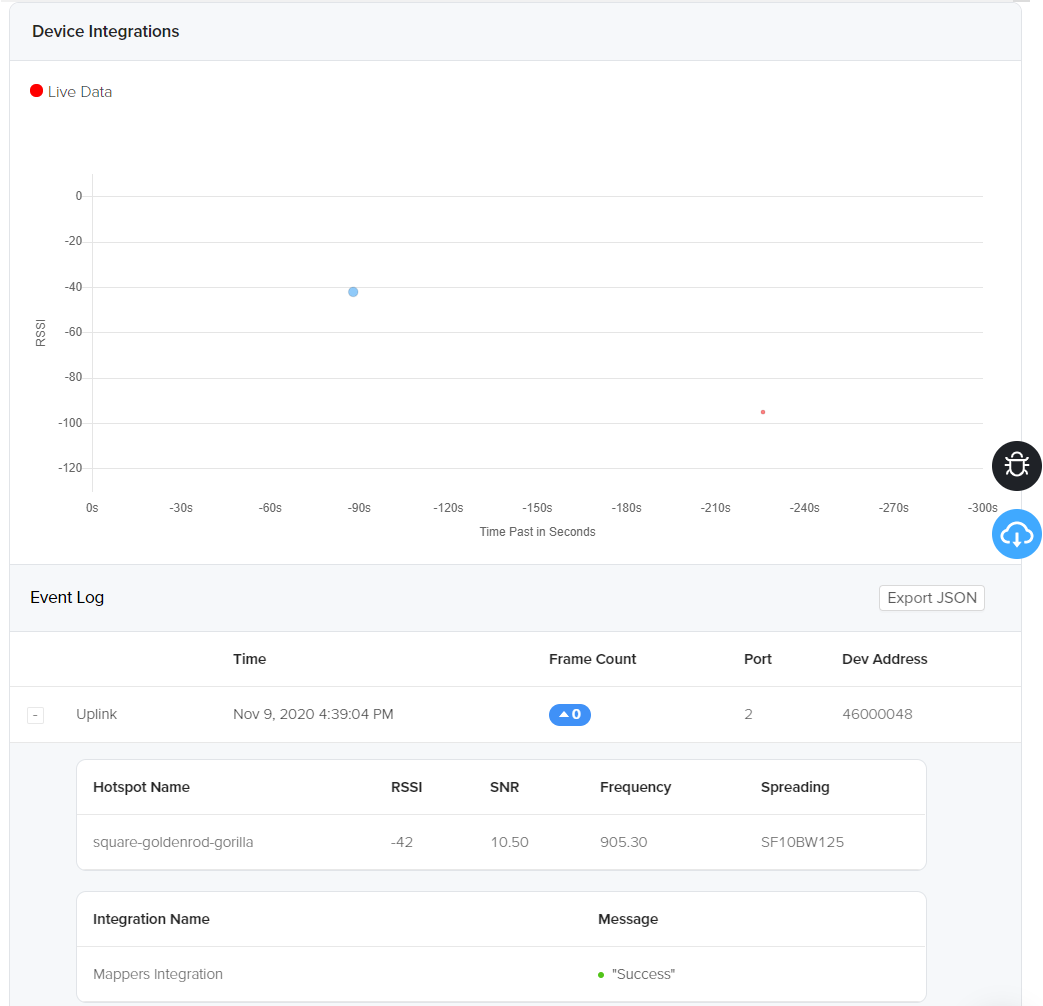
You are now ready to power on your device and verify that data is being sent correctly to the Mapper API. To do this just expand an uplink event in the event log and verify that you are getting a "Success" message for the integration as shown below.
That's all! You can now expect to see your data show up on mappers.helium.com in eight hours or less. The map data is updated every six hours starting at 04:20 UTC.